Jeff Kabachinski, MS-T, BS-ETE, MCNE

Keeping a vigil of online security includes doing a little document investigation before you send a document as an e-mail attachment or share it on a network drive.
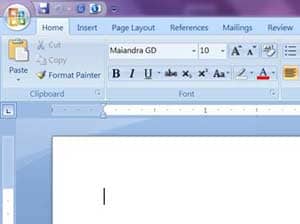
Photo 1. To get started, first click on the MS Office logo in the upper left corner of the window. From there, click on “Prepare.”
Are you aware that your Personally Identifiable Information (PII) tags along with Microsoft (MS) Office documents? Every MS Word document, Excel spreadsheet, and PowerPoint (PPT) presentation carries more information than you may have intended when you sent or shared it. Some of it is not obvious. Keeping a vigil of online security includes doing a little document investigation before you send it as an e-mail attachment or share it on a network drive. This month we take a look at what kind of information this is and how to remove or reduce it.
Every document not only has your intended content, but it also contains metadata—briefly described as something that describes other data. Document character or word count is innocuous metadata, for example, but there are other tags and metadata that may not be harmless. The most obvious in MS Office applications are the document properties. Typical properties can include the author’s name and company as well as metadata like original file and modification dates—in addition to who last saved it. These will be auto populated if MS Office knows or can find the information.
PII
Unfortunately, not all of this kind of information is something you will want to share. File location drive paths, for example, can divulge what other folders you have on your hard drive. Although not very common, there are fields for e-mail addresses or cell phone numbers that people can use to track contact info along with the document. Take a look under “properties.” Since it is no longer a standard menu item, you may have to find it under the MS Office icon (see photo 1) in the upper left corner of the MS Word window, then click on “Prepare,” and you will see it at the top of the pop-up box. In the window that opens you can find places for the author’s name and title, as well as several other pieces of document information. Click on the down arrow next to “document properties” (upper left corner of the pop-up box) to open the more traditional properties box. Under the “general” tab is where you will see the file location path. Under the “custom” tab you will see the extra properties fields that can be used to log information, such as phone numbers, e-mail addresses, project information, departments, groups, client names, etc. Also, send-for-review information, routing slips, printer paths, and file path information for publishing Web pages are other important PII that could be in there without your knowledge. This can be useful for you to use to help remember file details, but not necessarily information you want shared. Remember, once you attach an MS Office document to an e-mail or post it on a network drive, you have lost control of just who will end up with it.
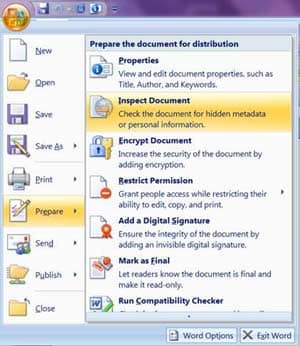
Photo 2. To check for metadata, click on “inspect document.” The inspector will ask you to save the file before proceeding.
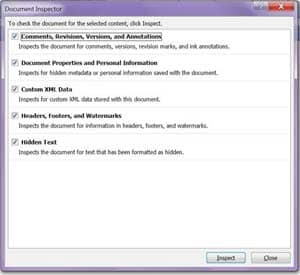
Photo 3. The document inspector window shows a list of things the different inspectors will look for and remove. You can select the ones you want to run.
There are several other types of hidden data and personal information that can be saved in an MS Office document. While it is not immediately visible when you open the document to use it, other people can easily find or retrieve the information if they know where to look. Hidden information includes data that is added to a file to enable collaborative writing with others. You can also intentionally hide information. Consider the following types of hidden data and personal information:
- Tracked Changes permits recorded comments, revision marks, version information, and ink annotations from tablet PCs. This allows other people to see the names of your reviewers as well as changes that were made to your document.
- Any headers, footers, and watermarks used in Word documents and Excel workbooks can contain PII.
- There is also hidden text formatting available in Word documents.
- Take a look for hidden rows, columns, and worksheets in an Excel workbook. Other people can unhide these rows, columns, or worksheets and see the data that they contain.
- You can format objects as invisible in PPT presentations and Excel workbooks. You will want to be sure that they do not contain anything that you prefer others not see when they undo the formatting.
- In PPT, there can be off-slide content. This is anything that can be dragged off the edge of the slide. It can be text boxes, clip art, graphics, or tables. In addition, there can be presentation notes associated with each PPT slide, typically written for the presenter to refer to, that you may prefer others do not see.
Inspector Gadgets
Fortunately, MS provides document inspectors that can search out and remove this kind of metadata and other hidden data for you. The process is pretty simple to use. First, be sure to save your document and use the inspectors on a copy of the document you are intending to share or send as an e-mail attachment. This is recommended in general practice but especially if you are sending it to someone external to your organization.
Each MS Office program has different kinds of inspectors. To find them, first click on the MS Office logo in the upper left corner of the window and click on “Prepare.” Then click on “Inspect Document” (photo 2). If you have not saved your file already, the inspector will ask you to save it before proceeding. In the document inspector window you will see a list of the kinds of things the different inspectors will look for and remove. You can select which ones you want to run. Click on “Inspect” (photo 3) and see what the results are. If the inspectors find anything, it will then give you the opportunity to remove it. At that point you will have a much cleaner document to share or attach to an e-mail without sending your PII along with it.
While it is a great set of inspection tools, they are not infallible. There are a couple of caveats to be aware of and look out for. In MS Word, for example, the inspectors will not find any text formatted in white on a white background or tiny font sizes of 1 or 2 picas. In Excel, it is highly recommended that you inspect the workbook first for hidden rows, columns, and worksheets. You want to make sure there is nothing in there important to your spreadsheet data. For example, it is a convenient way to store coefficients used in calculations elsewhere in the spread. Make sure you are not changing the functionality of the spreadsheet by erasing data in hidden cells. Also, the inspectors ignore shapes, charts, or control mechanisms that might be in a hidden column. The inspectors also ignore data that is covered (out of view) by pictures, clip art, or charts. This is also true in PPT. Anything covered by another object—in other words, out of view—will be ignored by the inspectors.
Using the MS inspector tools can help to make sure that we are not unintentionally sharing PII. The bottom line is that as we continue to keep an eye on security, using the MS inspector tools can help to make sure you are not sending your PII in any DOC, XLS, or PPT.
Jeff Kabachinski, MS-T, BS-ETE, MCNE, has more than 20 years of experience as an organizational development and training professional. He is the director of technical development for Aramark Clinical Technical Services in Charlotte, NC. For more information, contact .